Showing posts with label recipe. Show all posts

Monday, January 14, 2013

recipe: Granola

Mike and I are big fans of granola. Mike likes it because he's got a weird milk allergy, he can't handle a bowl of cereal and milk because he feels like his throat is going to close up, but yogurt and granola don't seem to make him stop breathing, so he's started eating granola and yogurt every morning.  Which is good, because I love my husband and don't want him to stop breathing on account of Honey Bunches of Oats.  Ok, back to the granola...

Granola can be expensive for a small amount when you buy the good stuff from the store. Especially the fancy gluten free varieties that we like to have.  (Again with Mike's quirks, we think he's gluten intolerant.)  So, I have recently started to make granola at home. It took a few times to get it right but I think I finally have. This recipe seems to be a winner. I also figured out that it's good to store your granola in a cute glass container on your counter, well you can decide on the "cute" part and if you want to store it on your counter or someplace else, but the glass container part in non-negotiable in my book.

PS - You'll see below that you can use coconut oil or olive oil for this recipe...Can someone tell me how Coconut oil works? I bought a jar of it and it's in solid form.  I have no idea how to get it out of that solid form (I assume heat it, but I am a bit puzzled)...which is why I use olive oil in this recipe instead, but soon I should become a grown up and figure out how to use the stuff that sits in my pantry.


Here's the recipe I found via Pinterest (I've added my notes in Italics.)
Granola Recipe 1.0
Yield: About 7 cups
This recipe is just a starting point. Granola is one of the most adaptable foods you can make. Use up the oats you have, if you’re low on those stir in extra nuts, seeds, or other fiber flakes. If you’re low on honey or maple syrup, do as Michelle does when in a pinch and make use of the jam jars in your fridge. The important thing to keep in mind is to add enough oil so the dried ingredients crisp. I like olive oil (after all I’m part Portuguese) and Michelle, a more sensible cook, likes coconut oil. Tweak to your liking.
3 cups old-fashioned rolled oats or equivalent measurement with oat bran, barley and flax seed mixed (I use gluten free oats)
1 cups raw almonds and / or pecans, roughly chopped (I use a cup of both)
1 cup pumpkin seeds (I never seem to have pumpkin seeds on hand so I omitted this)
1/2 cup coconut flakes
3/4 cup honey or maple syrup (I use a combination of local honey and maple syrup - it gives the right granola cluster consistency, I think.)
3/4 to 1 cup olive oil or coconut oil (I use olive oil)
1 teaspoon salt
1 teaspoons cinnamon
1 cup chopped dried cherries, currants, yellow raisins or a mix of all three (I toss in whatever I have in the pantry: dried pomegranates, figs, dates, prunes, craisins - everything has been delicious.)
Additionally, I add about a cup (or more) of chopped walnuts, sunflower seeds and because I can't find enough reasons to use up my pumpkin spice mixture, I toss in a teaspoon or so of that as well.  
1. Preheat oven to 325 degrees. In a large bowl, mix the oats, nuts, pumpkin seeds, coconut flakes, maple syrup or honey, oil, salt and cinnamon together. Spread mixture on a rimmed baking sheet in an even layer and bake for 45 minutes, stirring every 10 minutes, until golden brown and well toasted.
2. Transfer granola to a large bowl and add the dried fruit, tossing to combine. 
granola2-560.jpg
Photo: Maple Spice Granola from larissalmarks
Kitty Greenwald, cook and author, coordinates all things Eatsy — our locally sourced food program. Through communal staff meals held around handmade farm tables, and via seasonal dishes shared with you on our blog, Eatsy aims to nourish and inspire through food.

Tuesday, June 26, 2012

recipe: muesli


I'm a big fan of yogurt.  Greek yogurt to be exact. However, if I have yogurt too many days in a row, I feel like I might throw up because the consistency of eating just yogurt gets to me.  (I think it's one of those tolerances that builds up and builds up until you throw up. I don't think that's ever been medically proven, but any doctors out there, just give me a call, I can prove it through yogurt.)

Sometimes I get side tracked. 
Sometimes I like to talk to myself.
Sometimes I sing the abc's outloud in public at Target, by myself.
all true.

Sorry, where was I? 

Muesli. Ahhh yes.  Adding fruit and muesli to my yogurt doesn't make me want to barf.  Always a good thing. I'll stop talking about throwing up now because this really is a delicious recipe and I'd hate to turn you off.

Check out the recipe: here.  I added more figs because I couldn't find any dates at the store. I love figs, so this seemed like an extra special treat for me. 


The jedi says: Delicious, eat you now I will. (actually that'd be Yoda)

You might be asking why you need a jedi pen when making muesli?  You don't.  Mike found it in a cereal box and left it out as a present for me.  I dig it.  And it writes nice. Surprising, I know!

Monday, June 18, 2012

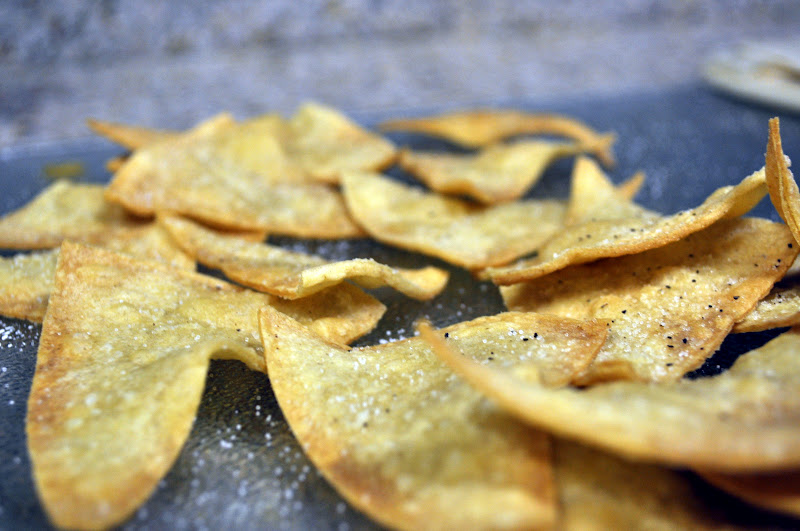
recipe: corn chips


I was watching Giada one day and she made her own tortilla chips, and I thought, huh, I am totally going to do that. And so I did.

the end.


Just kidding.
I think I got ya.


Why is is that corn tortillas seem to only come in a pack of 200 where as flour tortillas come in packs as small as 8? This is a perfect way to use up the rest of the 188 corn tortillas before they go bad.

Take 4-5 corn tortillas (depending on how many you are making - 4 tortillas made more than enough chips for Mike and I to last about a week.) Cut them in triangles - the smaller the triangle pie pieces the better - (I'm saying cut the tortilla into 6 pieces rather than 4 as the smaller chips seemed to be nice and crunchy where as the bigger chips I cut, were a bit chewy.)

Preheat oven to 350 degrees. I brushed both sides of the tortillas with a very small amount of olive oil - not much at all. Salt liberally (you might see in the picture above, a few specks of pepper - I accidentally grabbed the pepper shaker first. - My advice: look down at what shaker you are grabbing (highly intellectual advice, isn't it?)

Place tortilla wedges on roasting pan, making sure that you have them laid out on the pan with no overlap. Bake for 15 minutes or until chips are crispy and golden brown. 

Here's the recipe for Giada's Halibut Ceviche Salad with a side of corn tortilla chips: recipe.

Wednesday, February 15, 2012

recipe: chicken and rice with mushrooms


Ingredients


  • 2 cups boiling water
  • 1/4 cup dried porcini mushrooms (about 1/4 ounce)
  • 2 tablespoons olive oil, divided
  • 1 pound skinless, boneless chicken thighs, cut into 1-inch pieces
  • 1 teaspoon sweet paprika
  • 3/4 teaspoon salt, divided
  • 1/2 teaspoon freshly ground black pepper, divided
  • 3/4 cup chopped onion
  • 8 ounces cremini mushrooms, sliced
  • 3/4 cup uncooked brown basmati rice
  • 2 cups frozen green peas, thawed
  • 1 tablespoon chopped fresh thyme

  • Preparation

    1. Combine 2 cups boiling water and porcini mushrooms; let stand for 20 minutes. Drain through a sieve over a bowl, reserving soaking liquid. Finely chop mushrooms.
    2. Heat a large nonstick skillet over medium-high heat. Add 1 tablespoon olive oil to pan; swirl to coat. Sprinkle chicken evenly with paprika, 1/2 teaspoon salt, and 1/4 teaspoon pepper. Add chicken mixture to pan; sauté for 5 minutes or until chicken is browned, stirring occasionally. Remove chicken from pan.
    3. Return pan to medium-high heat. Add remaining 1 tablespoon oil to pan; swirl to coat. Add onion and cremini mushrooms; sprinkle with remaining 1/4 teaspoon salt and remaining 1/4 teaspoon pepper; sauté 4 minutes or until lightly browned, stirring occasionally. Stir in reserved porcini liquid, chopped porcini, and rice; bring to a boil. Cover, reduce heat to medium-low, and simmer gently for 35 minutes. Stir in the reserved chicken, peas, and thyme. Cover and cook 10 minutes or until rice is tender and chicken is done.

    ........................

    January's edition of Cooking Light has done it again! This recipe was a keeper.  Not much to change (other than a personal note to myself to stop cooking chicken too long!) But that's just my own personal battle of figuring out timing in the kitchen when I'm trying to cook the meat and other things all at once.